UpdraftPlus
Back up, restore and migrate your WordPress website with UpdraftPlus
Websites can accumulate hundreds, if not thousands of images over time. Images in their original uncompressed format can slow your website down, impacting user experience, bounce rate, and SEO performance.
This article outlines how to improve the speed of your site by optimizing images using WP-Optimize.
Image compression is included in both packages but when it comes to page load speed and SEO, every little bit helps.
Premium features includes ‘Lazy load’, which loads only parts of a web page that are visible to the user, allowing a page to load much faster. Additional benefits of Premium include multi-site support, scheduling so you can ‘set and forget’ and premium support. You can find out about the benefits of WP-Optimize Premium here.
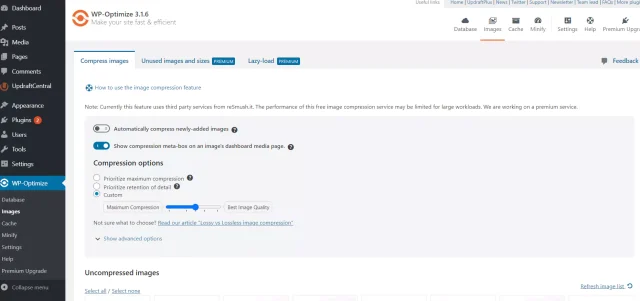
Once you have installed the WP-Optimize plugin, go to WP-Optimize > Images in your WordPress dashboard. Now you can decide what level of compression you want for your images. There are three options:
You’ll save the most space by selecting “Prioritize maximum compression“. This compresses your images, making them smaller and quicker to load, and as a result, your WordPress site will load faster. However, if you run a wedding photography website, for example, you may not want to compress your images fully, as there can be a slight drop in image quality the more an image is compressed. While the loss in quality is hardly noticeable for most people and is not a consideration for most websites, if high-end quality images are essential to you, then you should select “Prioritize retention of detail“. This option will still reduce the image file size (though not as much as ‘maximum compression’) but will maintain the high quality of the original image. You can also select “custom“, if you would like to format your images to a level that is not quite maximum compression or best image quality.
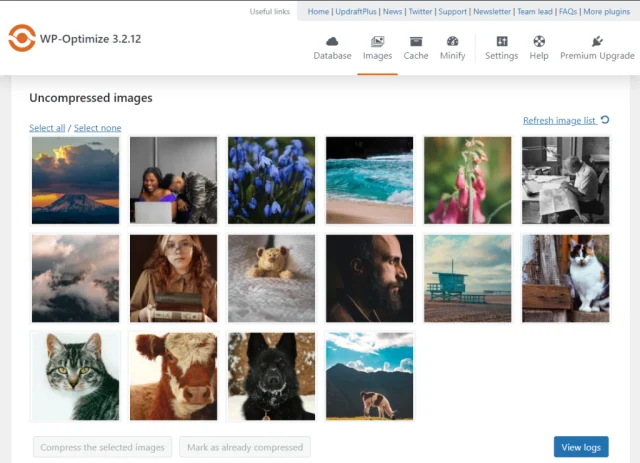
Below the settings options, you will see all the Uncompressed images uploaded to your website. Here, you can manually select individual images you wish to compress or press the ‘Select All’ button if you want to compress all the images to the same level. As previously mentioned, if you have high-quality images that you do not wish to fully compress alongside other images that may not be as important, you can individually select them and run a ‘maximum retention of detail’ compression. You can then run the ‘maximum compression’ option on the remaining images.
WP-Optimize also gives you ‘Advanced options‘ when compressing your images. Here you can choose options such as:

Once you have set up and decided what kind of image compression you are happy with, you can tick the “Automatically compress newly-added images” button so that you do not have to go through the process every time you upload a new image. Once you activate this option, every new image you upload will be compressed according to your chosen settings (compression or detail).

If you would like to read more information on the benefits of compression versus detail, check out the following blog that goes into more detail and explains the benefits of both: Lossy vs Lossless image compression – A guide to the trade-off between image size and quality.
We have also put together a video of how to optimize your images:
A version of this article was initially posted on the UpdraftPlus blog as “How to use WP-Optimize image compression.”
Try TeamUpdraft’s full suite of WordPress plugins.
Back up, restore and migrate your WordPress website with UpdraftPlus
Speed up and optimize your WordPress website. Cache your site, clean the database and compress images
Secure your WordPress website. Comprehensive, feature rich and easy to use
Centrally manage all your WordPress websites’ plugins, updates, backups, users, pages and posts from one location
Privacy-friendly analytics for your WordPress site. Get insights without compromising your visitors’ privacy